Monthly Archives: May 2010

Happy new home!

I visited my downline and friend, Katy, today and had a lovely time. She has moved to the Barossa and into a gorgeous home, so much character and love in that house! I wanted to make a card for her and her family to celebrate them moving into their home and here it is ….

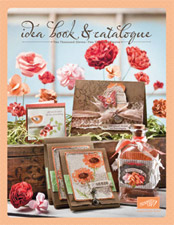
I stamped the house image in Old Olive on the Top Note die cut, then again on a scrap of Very Vanilla using Chocolate Chip so that I could cut out the chocolate house and mount it over the green house (mmm, chocolate house!! LOL!) I got that idea from page 54 of the IB&C where the ‘Welcome Home’ stamp set is pictured and I also did that for our housewarming invites – very cute and not too difficult to replicate en masse! The sentiment is actually one line of one of the stamps from the ‘Sweet Little Sentiments’ stamp set (Level 1 Hostess Set) – so handy being able to ‘select’ the text you want with a marker 😉 The flowers are made with the leaf from the XL 2-step bird punch, flowers from Trio Flower punch and finished off with the little rhinestones I popped out of the small Crystal brads.

I have to say the drive up and back was very peaceful (sleeping baby in the back, Robbie CD playing, coffee to drink……) and it got me all inspired, there were so many beautiful colours in the vineyards and orchards …. lots of Really Rust, Pumpkin Pie and Summer Sun leaves around …. what a lovely way to finish Autumn!

Now, if you like my flower on the card, then this is your lucky week! Stampin’ will be having a special deal each week in June and this week the Trio Flower Punch is one of 4 punches available at 30% off!

The specials listed below are available at the discounted price until 11pm (Adelaide time) Tuesday June 8th so if you’d like to purchase one or all of them let me know ASAP!

Item Page Description Regular Price Sale Price
112081 152 Scallop Square punch $30.95 $20.12
109183 153 Trio Flower punch $30.95 $20.12
110711 153 Boho Blossoms punch $30.95 $20.12
114889 n/a* Scallop Oval punch $30.95 $20.12

* from the Carryover flier

And, if these deals aren’t for you, never fear, next week there will be a new deal and that one might be the one for you! Night! K 🙂

Secret Sister

I’d heard about ‘Secret Sisters’ before but I’d never joined in with one until ‘UnConvention’ on the ESAD group! For those of us that couldn’t attend the Stampin’ Up! convention (sob, sob!) in Sydney last weekend, some of the girls on the ESAD group organised a fabulous weekend of challenges and activities for us to keep our minds off of the fun stuff the other were doing.

I didn’t get any of the challenges done on time but I have started a couple and have been very inspired – and challenged! – by them, so they will get me creative in the coming weeks. However, I did get to join in with a Card Swap (I’ll show pics of that later) and a Secret Sister swap. With the Secret Sister, it’s kind of like Secret Santa, you sign up for it then get given a name and send a card/gift to that person. The rules for this one were that it had to be a handmade gift and worth $10. Here is what I made for my Secret Sister ……

Can you see I liked the Very Vanilla/Rich Razzleberry combo? With the Friendly words Jumbo Wheel? And the Vintage Vogue flower with a half pearl? LOL! I had the colours in front of me and I just wanted to make it all match! I’ll describe what I’ve made just incase you can’t tell properly in the picture….

top left: I covered a little spiral bound notebook with Rich Razzleberry and stamped the cover with the Friendly Words Wheel before adding the cutout flower and half pearl.

top right: I folded a piece of card lengthways before cutting it with the top Note die to form a pocket. I stamped the front with the wheel and tucked in some of those Jarrah Latte Sachets before tying with some wide Very Vanilla ribbon and adding the flower and half pearl

bottom right: I scored a Top Note diecut shape 1/2″ either side of the centre mark to form the case of the box. I then cut a strip and scored it so that it formed the sides of the box (it also had tabs to stick to the base inside). Before sticking it together I stamped it with the wheel of course! 😉 Inside the box are some Felt Flowers in Rose Red, Pumpkin Pie and Old Olive and then I tied it and embellished it with the small flower this time 😉

bottom left: I used a scored Top Note Die to top a small cello bag containing some Werthers butterscotch lollies and of course the Top Note die was stamped and embellished like the other projects.

Lastly, I also made a little mini pizzabox to put a tealight candle in

And here was the card I made to go with it …. I kept the colour theme except I added a little Kraft and Chocolate 😉

Hope my Secret Sister liked it all!  Happy Unconvention!! Cheers, K 🙂

Sharing ….

Last month I held my first Stamp’n’Chat night this year. It’s a night where my customers and friends can come along and bring their own projects to work on, but use my stamps, inks and punches to do so.

Nadia was wanting to make some invitations for her daughter’s birthday so she ordered the Pony Party set from the mini catalogue and picked colours and a design based on a card in the catalogue too. Well, this is the end product!  How cute!

And thank you to Nadia too for giving me one as a sample! She knew I didn’t have the stamp set and wanted me to have a sample with it! :*

And …. just speaking of cute… I had to share this picture of Audrey from about a month ago! When I put her in this outfit I immediately thought, ooh! Rich Razzleberry and Taken With Teal! So here she is while her mummy is trying to colour match her top with inks 🙂 she looks quite at home holding an ink pad, doesn’t she?!

Happy Friday everyone! K 🙂

Looking for a special?

Have you ever been placing your Stampin’ Up! order and thought, “Gee, I spend enough, maybe I should join and get my products at a discount?” Well, Stampin’ Up! has a special for you!

From 21st May to 31st July, Stampin’ Up! is offering the Starter Kit at 20% off! That’s right, instead of $324 you will only pay $259! That’s a fabulous saving when you consider that the kit contains over $560 worth of products and supplies! You’ll be paying under half price! PLUS you’ll be joining a great group of people who all love creating and sharing their creations so you’ll have access to fabulous ideas through the Stampin’ Up! website and forum as well as the team forums.

If this sounds like something you’d like to do or you’d like to find out more, please email me for more information and I can email or post a pack to you.

Take care, K 🙂

Another pop-up card

I had so much fun playing with and making the spiral pop-up card for our class last Saturday, that when I went to make a birthday card for my Nanna, I couldn’t resist making her one too!

Now, you’ll notice I have used something different for the alphabet on this one …. no, it’s not the Jumbo Outline Alpha …. it’s the Timeless Type Junior Alphabet dies with the Big Shot! They are fabulous and very easy to use, plus, thanks to a tip from the lovely Jo Wassens (newly crowned #7 Demonstrator of the Year!) I learned that you can punch out circles of your cardstock or DSP and use them to place over individual letters before running it through the Big Shot! Even easier!

I’ve used Certainly Celery stamped with Certainly Celery flowers for the base card and then some of the Cottage Wall DSP and the butterfly is from the Cottage Garden set, as is the flower on the base card. The leaves are made using the Little Leaves die on the Big Shot too – can you tell I love my Big Shot?! LOL!

Happy Birthday Nanna! Hope it’s a lovely day! xxxx

That’s all from me for today! Take care, K 🙂

What to do with a tin?

On the INKlings forum, someone was asking for suggestions of how to use up old formula tins a while ago. Well, seeing as how we have a few here ::) I thought I’d use one of the suggestions to use one up 😉

One of the girls had suggested using it to put a gift in, kind of like a bag or basket, so, as one of my friends was moving house, I thought I’d make her a ‘Survival Kit’ and pack the tin full of things that might come in handy – panadol, bandaids, chocolate, minties 🙂 …. but, of course, I had to decorate it first!!

Very handy for ‘wrapping’ the gift …. even more so because this was getting posted interstate! Some pretty DSP, a bit of ribbon and a bow and it’s done. the circle scissors make it soooo easy to cut out the circles for the top too 🙂 oh, and it was my first attempt at doing a ‘Teneale Bow’ – check out her video on her post  here to see how she makes them, hers always look so lovely, hopefully with a bit of practice I will get better at it too 🙂

Have a great weekend! K 🙂

Golf Tee!

Yes, that’s right! I hadn’t forgotten, just hadn’t uploaded the pictures yet! 😉

Well, Sharna was right! It was the round tab punch!!! Here is how…..

I punched out one tab

then pushed the punched tab into one side of the punch so that it would form 2 ‘tee’ shaped pieces.


Of course there is a slightly pointed top, but this is covered by the ball when you put it on the tee 🙂

I’m glad you all liked the card and hope your golfing recipients enjoy their cards too!

Enjoy! K 🙂

PS Sorry about the quality of my pictures lately. I’ve been trying out different spots around the house to take them to see what light is best, but then I have been using 2 different computer screens which are obviously not quite the same in terms of display which has been a bit tricky 😉 I also have new glasses on order and I think they may make a different to how I am seeing them on screen!! LOL! Anyway, thanks for your patience! 🙂

Embossed leaves

During the INKlings blog hop I saw a great idea on Rachel’s blog – creating your own embossing plates! She used stars on her cards, but I thought I would use the punched leaves from the XL 2-step Bird Punch to create an embossed background on my card.

The embossing is really hard to photograph though! LOL! It’s in the bottom right hand corner and across the middle under the bird, above the text.

Here is what the embossing plate I made looks like….

Basically, I traced the size of the cardfront onto a piece of heavy cardstock and punched out several leaves from cardstock (I used the DSP backing) and using the 2way glue pen I stuck the leaves on in the arrangement I wanted. I then repeated the process so that the cardstock leaves were twice as thick.

When I went to run it through my Big Shot it was a matter of trial and error to determine the thickness of cardstock required as ‘shim’ to create the embossed image, too little and the embossing hardly shows, too much and it won’t roll through the Big Shot. What I found worked for my embossing plate and Big Shot was 3 pieces of thicker cardstock (cut from the DSP backing cardstock) and then 1 sheet of Whisper White cardstock, plus the sheet  I was wanting to emboss. It is really important to make sure you don’t ever force your ‘stack’ through your Big Shot as it can damage your plates and/or machine. If you meet with more resistance than normal, roll the stack back out and rearrange or try a different combination.

I hope you have some fun playing with this idea, I know I can’t wait to try some other punched shapes!!! Take care, K 🙂

PS here’s what my little man made while I was making my birdies! As soon as he hears me say I’m ‘making’ something, he gets his stool or a chair to be next to me …. “I’ll help you!” So cute 🙂

Interactive cards

I’ve been having a bit of fun creating some interactive cards with the Fox and Friends set. It’s so much fun to create a card that has that extra appeal to it – for example watching someone tip a spinner card from side to side for 10 minutes, totally focussed on it! LOL!

Here are my viewfinder, spinner and spiral pop up cards closed ……

and then when they’ve popped, spun and turned ……

If you’d like to come along to a class and make these three cards (all supplies provided) and you live in Adelaide, then you are in luck! I am holding a class at my house on Saturday 22nd May at 2pm, cost is $20 and that includes all your supplies to make the 3 cards plus instructions so that you can re-create them at home …. and a cuppa and cake too! If you’d like to come please RSVP by Thursday 20th May to me or, if you can’t make it then but would love to learn how to make these cards, please contact me and we can arrange another time for a class either at my house or your house (minimum 4 guests).

Looking forward to seeing you soon! K 🙂

Inaugural INKlings Blog Hop!


Welcome to The INKlings’ Team’s first ever blog hop. You may have arrived here from Amy’s inspiring blog, or just be visiting my blog, but whichever way you arrived here, once you’ve checked out my creations you can continue the hop through the link at the end of this post to the next team member.

What style of cards do we frequently get asked for inspiration for? More often than not it’s masculine cards, be it little boys or grandfathers, everyone seems to struggle with cards for the males in our lives. So as a team we thought we’d help you out by providing you with 20 team members’ fantastic blogs that you can hop through and get lots of fantastic ideas from.

Want to win some Blog Candy? Simply leave a comment on each blog and then email Michelle Dyson and let her know you’ve done so and you’ll be in the running for a fantastic prize of 20 handmade cards plus other goodies. (Sorry Blog Candy prize not available to SU! demonstrators)

Okay, so on to my projects for tonight! I had been wanting to try out the ‘Faux Suede’ Technique and I thought this would make a nice masculine background on a card, especially when combined with the Wanted Stamp Set. What I did to create the Faux Suede piece is to crumple and then smooth out the piece of Whisper White cardstock repeatedly until the cardstock began to separate into layers. Once this began I pulled the layers carefully apart to reveal a slightly ‘fluffy’ side. To add some more texture I then sponged this ‘fluffy’ side with Close to Cocoa, Chocolate Chip and Baja Breeze inks before stamping with the horse image. You can also see how I’ve distressed the edge of the Chocolate Chip layer under the stamped image with my bone folder to separate the layers too, using your bone folder to repeatedly burnish the cardstock is another way to get the layers to separate and do this Faux Suede technique.

I was saying to some girls at my class last week how the Perfect Polka Dot embossing folder would be handy to make a golf ball if you used the ‘wrong’ side of the cardstock ….. so I thought I’d make a golf card too (lucky my dad doesn’t read this, his birthday is coming up!! LOL! and yes, he is a golfer!!)

There’s not much stamping on this one and it was very quick and easy to make. My punches made it easy too, for the ball, green, and the sentiment. I also used my photo corner punch to help create the flag and then I used another punch for something else …… anyone like to venture a guess as to what punch I used the create the tee? Leave your guess in the comments and I’ll be back tomorrow and show you how 😉  

And my last offering for tonight is this little tool box! I got the template for this box from Jeanne on Splitcoast Stampers and it was intended as a Timbits box! Now for the non-Canadians or uninitiated out there, Tim Hortons is a Coffee mecca in Canada and the donuts are just divine, Timbits are actually the ‘donut holes’!! So cute and mmmmmm *insert Homer Simpson drool here*

But, for today, this box has become a tool box;) Once I had printed (on Close to Cocoa) and cut out the box I dragged my Chocolate Chip inkpad along it to create a kind of woodgrain effect. Just a couple of little embellishments and then….. well what good is a tool box without tools? I decided to emboss the tool images from the Totally Tool Stamp Set in Black onto the Silver Brushed Metallic cardstock and cut them out to add them in. Of course I’m sure adding some of the recipients favourite lollies or chockies would’t go astray either 😉

Well that’s all from me. Next stop on the INKlings’ Team Blog Hop is the INKlings fabulous leader herself, Jayne Mercer! Have fun and don’t forget to leave a comment on each blog to win some great Blog Candy.

Happy Hopping! K 🙂

PS Just in case you got lost on the hop, here’s some links and a list of all the blogs on the way 🙂

Clare

Janice

Dani

Kylie

Amy

Kari – me!

Jayne

Joanna

Michelle

Christie

Ryn

Fiona

Beth

Nicky

Dani F

Michelle F-S

Rachel J

Rachel C

Carolyn

Michelle Le Breton